DIY Herbal Fellowship

Cultivating confidence in using herbs and essential oils

  • DIY Herbal Fellowship
  • Start Here
    • DIY Herbalist Way
      • I’m a Sprout!
      • I’m a Seedling!
      • I’m Growing!
      • I’m Blossoming
      • I’m Fruitful!
  • Choose Your Own Herbal Adventure
  • Herb of the Month Club
    • Search the Herb of the Month Club
  • Techniques
  • Bonuses
    • Goal Planning For Herbalists
    • Herbalist Viral Protocol
  • Log In
  • Support
    • Join Us
    • F.A.Q
You are here: Home / Herb Garden / How to Braid Garlic and Onions so that the Harvest Lasts Longer

How to Braid Garlic and Onions so that the Harvest Lasts Longer

Braid garlic, onions, shallots, or other bulb alliums to increase their keeping qualities and make them last longer in storage.  Learn how to braid garlic and other bulb alliums with this tutorial.

When you harvest garlic, onions, shallots, or other bulb alliums from your garden wouldn’t it be nice if the harvest would last till next year’s harvest season without sprouting or going funky? Braiding garlic, onions, or shallots can increase their keeping quality by several months. In the case of garlic it can prevent the cloves from sprouting through to the next harvest season, even when kept in a warm kitchen. Onions and shallots vary in their keeping quality. However, a long keeping onion like yellow cooking onions will keep even longer when braided for winter storage, and properly cured.

How to cure onions, garlic, and other allium bulbs

Alliums need to be cured by exposure to air in order to form the paper-like wrappers around the bulbs.  When they are first pulled from the soil this wrapper is damp and prone to mold.  However with proper curing this wrapper forms a protective layer over the bulb.  The wrapper itself is high in antioxidants and prevents spoilage, if left intact.  Curing usually takes a week to 10 days in the shade, protected from frost.


How to braid garlic, onions, and other allium bulbs

Braiding the long, green leaves or stalks of bulb alliums helps them last longer in storage.  At harvest the leaves are generally moist and green.  During the curing period the energy in the stalks is transfered to the bulb, increasing its keeping qualities.  This can be enhanced if the green leaves are braided and the braid is hung to dry in a spot with good air circulation.  While garlic that is stored in the head in a clay jar, tends to dry out or sprout in a few months, braided garlic will last a full year to the next harvest.

Watch this tutorial to see how you can easily braid garlic for longer storage

This technique will work on any bulb allium.  However, only the most pungent onions have a long keeping quality.  Sweeter, juicier onions tend to have a shorter shelf life due to their higher water content.  Even these will last longer if braided at harvest.  However, they won’t last for an entire year, so plan to use them first.


Tutorial Instructions:

Download the printable instructions here.

How to braid garlic and onions to extend their shelf life

Step 1: Choose 3 large or 5 small garlic heads.  Tie them together at their necks using an elastic band.

Step 2: Divide the garlic bunch into 3 strand of equal thickness.

Braid by taking the strand on the right and crossing it over the middle strand.  Lay it between the middle strand and the left strand.

Step 3: Take the strand on the left and cross it over the middle strand.  Lay it between the middle strand and the right strand.

Step 4: Take the strand on the right and cross it over the middle strand.  Add a new garlic head by placing it over top of the right strand.  Tuck the stalk of the new garlic head in the middle along with the strand of stalks from the right side.

Step 5: Take the strand on the left and cross it over the middle strand.  Add a new garlic head by placing it over the top of the left strand.  Tuck the new stalk in the middle along with the strands from the left side.

Step 6 and 7: (Repeat steps 4 and 5)  You can add 1 to 3 garlic heads at a time, always incorporating their stalks into the bundle of stalks you are working with. Alternate between the right bundle of stalks and the left bundle of stalks to make your braid.

When you have finished adding garlic heads to your braid, continue braiding until you have about 12 to 15 inches in free braid, with no garlic heads in the braid.

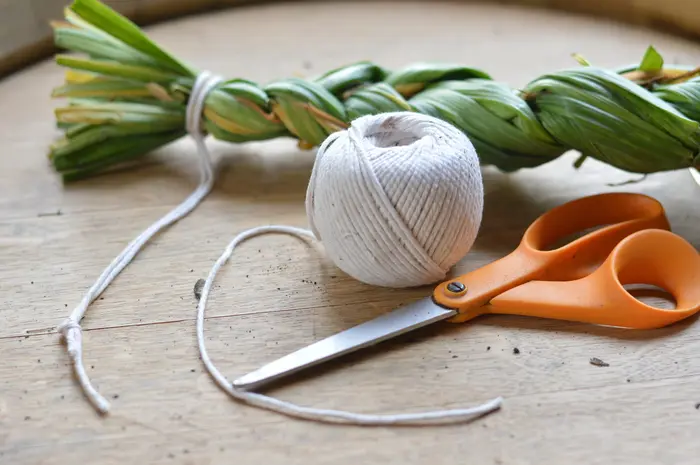
Step 8: Tie the top of the braid with twine to secure the braid and provide a loop to hang it with.

Step 9: Trim any roots on the garlic heads and any stray pieces of stalk before hanging.

Hang in a cool, dry spot to dry and cure over 5 to 7 days.  Protect from frost if necessary.

Using your hands brush off any loose papery skins before bringing it indoors to your kitchen.

To use cut off the garlic head from the braid using scissors.

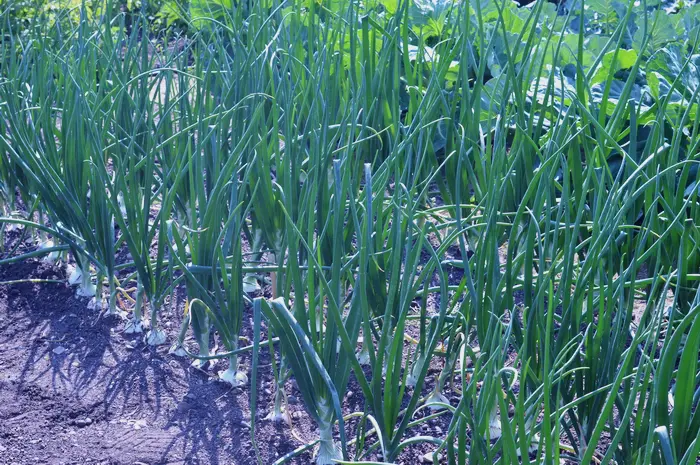
Use this technique to braid onions or shallots too

Garden grown onions or shallots may also be preserved by braiding and hanging in your kitchen.

«
»

Herb Garden, Preservation

Welcome back member! Log in here!


Forgot Password

The DIY Herbal Fellowship is here to help you invest in self-reliance, cultivate community, and grow in resilience, through confidently growing and using herbs for food, and for health and wellness. Welcome to the Resistance!

Q and A Search

We are here for you!

Or email: support@thediyherbal.com


Frequently Asked Questions

How is the DIY Herbal Fellowship different from other herbal programs like the Herbal Academy?

At the DIY Herbal Fellowship, we emphasize homegrown and foraged herbalism. We teach how to grow your own medicine, so you aren't dependent on the global supply chain for your wellness.

In the classes from other herb schools you'll get a long list of herbs you need to buy in order to complete the classes and a lot of these herbs are from herbal traditions from tropical climates, so you will need to buy imported herbs, that may have been in storage a long time before they reach you.  Herbs you can grow and harvest close to where you live have been challenged by the same stressors that you've been challenged with and they have the unique metabolites that you need to thrive.

We also provide a list of herbs that you can buy if you don't have access to a garden or places you can forage, but growing your own gives you access to that unique property in herbs, that you can't buy in a store.

I’ve enrolled in herb classes from other herb schools that I didn’t complete. Can I successfully complete anything inside the DIY Herbal Fellowship?

Joining the DIY Herbal Fellowship can give you the support you need to complete the courses you've already signed up for, if you still have access to them.  Many of our members are also working through certificate programs at Herbal Academy or other herb schools. They use the support and the methods we teach in the DIY Herbal Fellowship to help them systematically work through their other courses and retain the information they are learning.

The masterclasses inside the DIY Herbal Fellowship are different than what you'll find in other herb schools.  We have success built into each masterclass.  The lessons are designed to be completed during a break time, so that busy women don't get left behind.  (Aren't we all very busy!)Each lesson inside the masterclasses are just 15 to 20 minutes long.  The hands on projects can be done in the margins, while you are working on other things, like supervising homework, or waiting for dinner to cook.  You don't need to wait till you have a few hours alone-time to get started.  15 minutes can be a start.

Also you'll enjoy quarterly implementation challenges to encourage you along your journey.  These include games or other strategies to keep you moving forward to reach your goals and master the aspects within herbal studies that are important to you.

If you have a life challenge though, and can't complete the monthly masterclasses for a period of time, you don't lose access to them, as long as you remain a member in good standing.  The masterclasses will wait for you.

How much time does it take to complete a masterclass? I don’t have a lot of time.

You'll want to have at least one hour a week to dedicate to the DIY Herbal Fellowship, to complete at least one masterclass a month, do the hands on projects, participate in the Q and A and the coffee chat.  If you don't have that much time, you might feel frustrated inside the DIY Herbal Fellowship because you'll miss the interaction and the support.  If you have more than one hour a week available, you'll be able to do several masterclasses each month.  Each masterclass takes between one hour and 1 1/2 hours to complete.  You'll get a certificate after you complete each masterclass, so you'll have a record of the time you've invested in your herbal learning.

What’s the difference between the membership and your courses at Joybilee Academy?

The courses at Joybilee Academy are generally longer.  They don't have active support, so there are no live Q and As, no coffee chats, no dedicated Facebook group to ask questions or get feedback.  Its for people that want to learn from me but don't need or want active support.  The courses are also static.  No new material is added once the course is published.  Only one of the classes in Joybilee Academy has a certificate on completion.

On the other hand, the membership has a monthly masterclass that is designed so that you can watch each lesson during a coffee break, for those that don't have a lot of time.  There is an active component focused on hands on application for the lessons.  We learn better when we apply what we learn through hands on projects, so we integrate that into the classes. You have something to show for what you learned. There is a live monthly Q and A where the members can ask questions and get feedback.  It is recorded so those who can't make it live can view it. Also (the fellowship part) we have a monthly coffee time (not recorded) where members can get together and build relationships, network, and share.  Quarterly, inside the membership, we'll do challenges and games to help with implementation and improve how much people remember of the masterclasses. These are great for making progress on your goals and cheering others on, building relationships inside the community.

The membership has a dedicated Facebook group where members can connect, ask questions, get feedback, share information. I'm in that group daily.

Why do you need my mailing address?

Please use your best mailing address when you give us your contact information.  While there are no physical products included with the monthly membership purchase, there are periodic surprises that may be mailed out to members, so your mailing address is required when you register.

To ensure that parcels mailed to you don't get returned by the post office, please keep your mailing address up to date.  Periodically we will ask members to update their mailing address in their member account so that we can make your experience as a DIY Herbal Fellowship member awesome.

I’m a member. How do I enroll in one of the Masterclasses?

It's easy to enroll in any of the masterclasses on the site

Step 1: Log into the site using your user name and password.   If you forget your password just click on the "lost your password?" link and it will send you an email to let you reset your password.  Go here to log in.
Once you log in you'll be taken to your personal dashboard.  Here you'll see an icon that says, "Courses".  Tap/click on this icon to see all the masterclasses you have access to, in alphabetical order.  You can tap/click on the link for any of these courses to begin the course.
If you've already taken a course you'll find it under the "Profile" icon in your dashboard.  If you've already enrolled in a course, you'll find your progress under "courses" in your profile.
You'll find all the courses you have access to in your dashboard so that you can get started on that right away and get a good foundation.
Step 2: To enroll in a new DIY Herbal Masterclasses go to this link: https://thediyherbal.com/courses/ inside your dashboard.  All classes are in alphabetical order.  You can use both the search function and the category function to browse the catalog of courses.
Go to the class that interests you.  Tap/click the green "Start" button to begin any lesson.  Move through the course using the bar at the top of the page.  If you are viewing your courses on your cell phone, it's helpful to turn the screen horizontally to see the green button used for navigation, at the top of each lesson.
Step 3:  You can get back to your courses and pick up where you left off, clicking or tapping on the course icon in your dashboard under "courses" or in your profile area of the membership site.

How do I update my payment method?

This video will guide you through to update or change your payment method in your dashboard:

Herb of the Month

Masterclass

Privacy Policy

Privacy Policy

Terms of Use

Dislosure


  • Start Here
  • F.A.Q
  • Support
  • Privacy Policy
  • Terms and Conditions

Copyright © 2025 · Darling theme by Restored 316

Copyright © 2025 · Darling Theme on Genesis Framework · WordPress · Log in