DIY Herbal Fellowship

Cultivating confidence in using herbs and essential oils

  • DIY Herbal Fellowship
  • Start Here
    • DIY Herbalist Way
      • I’m a Sprout!
      • I’m a Seedling!
      • I’m Growing!
      • I’m Blossoming
      • I’m Fruitful!
  • Choose Your Own Herbal Adventure
  • Herb of the Month Club
    • Search the Herb of the Month Club
  • Techniques
  • Bonuses
    • Goal Planning For Herbalists
    • Herbalist Viral Protocol
  • Log In
  • Support
    • Join Us
    • F.A.Q
You are here: Home / Growing / Herb Camp Day 18: Plant an Herb Pot

Herb Camp Day 18: Plant an Herb Pot

WELCOME TO HERB CAMP 2020! In this third of three weeks of herb camp, the theme is “Herbal Creativity” Today you get to roll up your sleeves for another camp craft.  This time we are going to plant an herb pot.

If you have an outdoor garden area you may not see the benefit of growing herbs in containers, however, container grown herbs help keep herbs close to where you use them.  For instance I have a potted aloe vera plant on my kitchen window sill.  I’ve needed it several times when I’ve burned a finger or palm in the kitchen.  Having it right there within a few feet of my stove, allows me to get to it quickly when I need it.


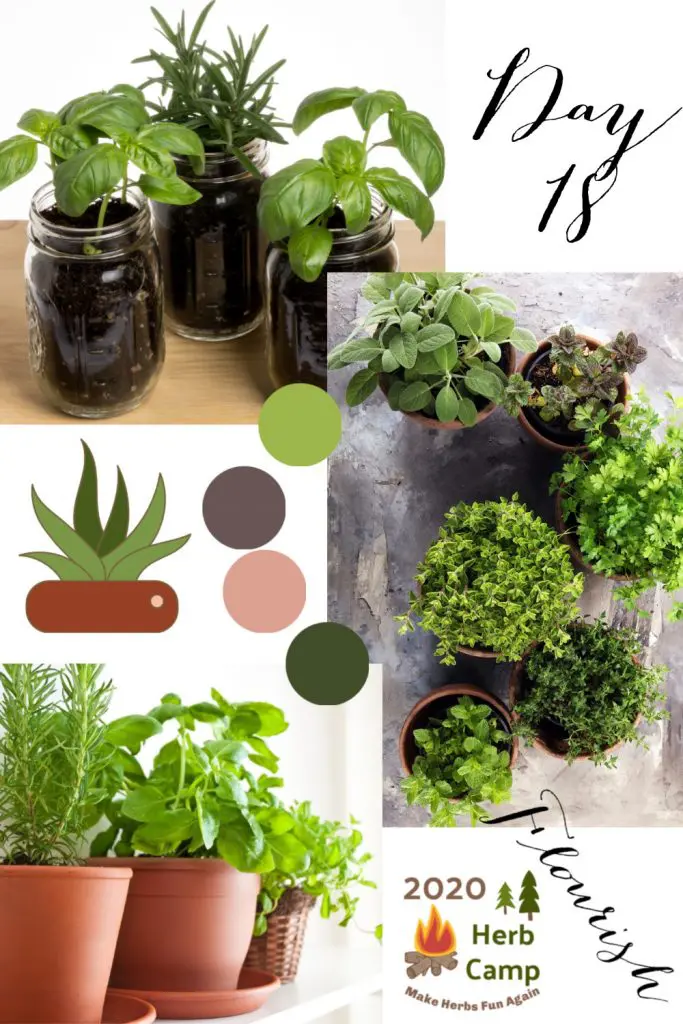
Last winter I potted up some garlic chive plants from the garden just after the first frost.  I used them all winter long in egg dishes, salads, and on potatoes to give us that fresh chive flavor throughout the winter.  While the pot wasn’t huge we did get one cutting a week from this chive pot.  Chives don’t require a lot of light, so I kept it on the window sill and didn’t need to add supplemental lighting, even in December.

Kitchen herbs that require a longer growing season like rosemary or thyme are also good candidates for container growing in a small kitchen garden. Starting them in pots instead of transplanting them into pots at the end of the season can spare them the stress of transplanting, making it more likely they will survive the winter.

What you need to start an herb pot

  • Herb seeds, herb cuttings, or garden herbs to divide
  • Garden soil
  • Worm castings or finished compost
  • Pot with a drainage hole
  • Saucer for pot

Rosemary, oregano, thyme and basil.

Tips for container growing

  1. Don’t over crowd the pot.  For a small pot, 1 plant is enough, for a larger planter allow some space between plants for the herbs to expand.  You can control the size by trimming the plant frequently.
  2. Ensure all pots have good drainage.  Drainage can be improved by adding rocks or marbles into the bottom of a container to prevent roots from sitting in water.
  3. I like to add a cup of worm castings to the garden soil, when I’m potting up a new planter.  This adds a slow release organic fertilizer and organic matter to the soil.  If you don’t have worm castings, finished compost can be added instead.  Avoid fish meal and fish fertilizers with herb planters intended to be housed in your kitchen.  While these are a good source of organic nitrogen, they can smell pretty high and shouldn’t be used on indoor plants.  Deodorized fish fertilizer is an option, if you can find it.
  4. Potting soil blends are not the ideal medium for growing herbs in the kitchen.  Peat and vermiculite are nutrient poor and slightly acidic.  While this is an ideal environment for seed starting, it isn’t meant for long term plant growth.  This can create poor growth in a potted herb unless the soil is heavily amended with both organic matter and nutrients.
  5. Keep the herbs in the pot trimmed, according to species, in order to encourage new growth.
  6. Don’t over water.  Water only when the soil surface is dry to the touch, but don’t let the pot dry out completely.

Good kitchen herbs for container growing

  • Chives and garlic chives
  • Sage
  • Rosemary
  • Thyme
  • Multiplier onions
  • Greek oregano
  • Parsley
  • Lemon balm
  • Basil
  • Holy basil
  • Aloe vera (for kitchen first aid)

Rosemary, Basil and Mint

Keep herbs that like water (basil, lemon balm, parsley, chives) together and those that prefer drier soils together (rosemary, thyme, sage, oregano).  Choose plants that are about the same height when planning your container herb garden.  It’s fine to put more than one herb in a pot with other herbs, but their needs should be similar. Feed your herb pot once a week with seaweed fertilizer or comfrey tea.  Left over herb tea is a great addition for in-between watering.


How to harvest

Wait till the plant is at least 8 inches tall before taking the first cutting.  Cut the plant just above a leaf junction to encourage more leaf growth.  When harvested this way several cutting can be made in a season.

After harvest, encourage fresh growth by watering with a water soluble organic fertilizer.
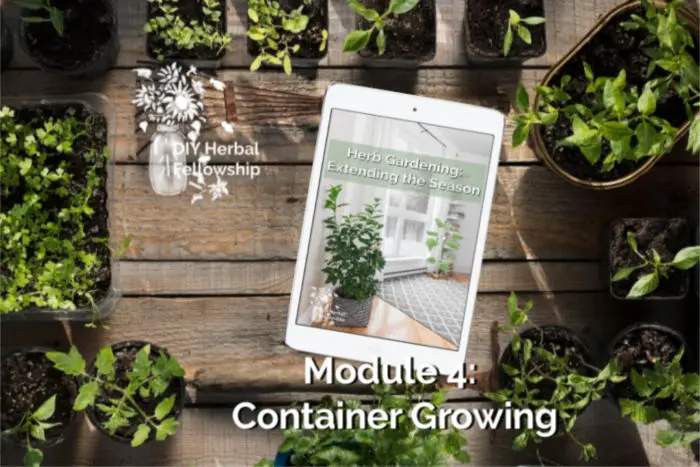
For more help

Check out module 4 of the Herb Gardening Extending the Season Masterclass


 Your challenge

Make a fresh herb planter or herb pot for your kitchen herbs.  Find a spot for it in a sunny location.  Plant it with your favorite herb(s),  whether by seed or by transplanting.  Admire it.  Share a photo in the Facebook group here or in a picture share site (share the link in the comments).

Note: Click the small arrow on the LEFT to go to the previous day’s Herb Camp Challenge. Click the small arrow on the RIGHT to go to the next day’s Herb Camp Challenge.

«
»

Growing, Herb Camp 2

Comments

  1. Margot Muenzing says

    07/01/2020 at 8:10 pm

    I keep an aloe plant in my kitchen but am going to add some chives ( I like your idea!) and coriander which we can’t have enough of!

    Log in to Reply
  2. Bobbi Thompson says

    06/18/2020 at 11:11 am

    Fun project. I have some garlic chives seeds I need to plant.. maybe I’ll plant some in a pot… I do have some sage, lemon thyme and oregano, rosemary and lavender as well as peppermint and lemon balm growing out side.. Just planted some Russian sage near the bee hives.. hoping they’ll take off.. Had ordered some live plants but all I got in the mail was some dried up sticks.

    Log in to Reply

Leave a Reply Cancel reply

You must be logged in to post a comment.

Welcome back member! Log in here!


Forgot Password

The DIY Herbal Fellowship is here to help you invest in self-reliance, cultivate community, and grow in resilience, through confidently growing and using herbs for food, and for health and wellness. Welcome to the Resistance!

Q and A Search

We are here for you!

Or email: support@thediyherbal.com


Frequently Asked Questions

How is the DIY Herbal Fellowship different from other herbal programs like the Herbal Academy?

At the DIY Herbal Fellowship, we emphasize homegrown and foraged herbalism. We teach how to grow your own medicine, so you aren't dependent on the global supply chain for your wellness.

In the classes from other herb schools you'll get a long list of herbs you need to buy in order to complete the classes and a lot of these herbs are from herbal traditions from tropical climates, so you will need to buy imported herbs, that may have been in storage a long time before they reach you.  Herbs you can grow and harvest close to where you live have been challenged by the same stressors that you've been challenged with and they have the unique metabolites that you need to thrive.

We also provide a list of herbs that you can buy if you don't have access to a garden or places you can forage, but growing your own gives you access to that unique property in herbs, that you can't buy in a store.

I’ve enrolled in herb classes from other herb schools that I didn’t complete. Can I successfully complete anything inside the DIY Herbal Fellowship?

Joining the DIY Herbal Fellowship can give you the support you need to complete the courses you've already signed up for, if you still have access to them.  Many of our members are also working through certificate programs at Herbal Academy or other herb schools. They use the support and the methods we teach in the DIY Herbal Fellowship to help them systematically work through their other courses and retain the information they are learning.

The masterclasses inside the DIY Herbal Fellowship are different than what you'll find in other herb schools.  We have success built into each masterclass.  The lessons are designed to be completed during a break time, so that busy women don't get left behind.  (Aren't we all very busy!)Each lesson inside the masterclasses are just 15 to 20 minutes long.  The hands on projects can be done in the margins, while you are working on other things, like supervising homework, or waiting for dinner to cook.  You don't need to wait till you have a few hours alone-time to get started.  15 minutes can be a start.

Also you'll enjoy quarterly implementation challenges to encourage you along your journey.  These include games or other strategies to keep you moving forward to reach your goals and master the aspects within herbal studies that are important to you.

If you have a life challenge though, and can't complete the monthly masterclasses for a period of time, you don't lose access to them, as long as you remain a member in good standing.  The masterclasses will wait for you.

How much time does it take to complete a masterclass? I don’t have a lot of time.

You'll want to have at least one hour a week to dedicate to the DIY Herbal Fellowship, to complete at least one masterclass a month, do the hands on projects, participate in the Q and A and the coffee chat.  If you don't have that much time, you might feel frustrated inside the DIY Herbal Fellowship because you'll miss the interaction and the support.  If you have more than one hour a week available, you'll be able to do several masterclasses each month.  Each masterclass takes between one hour and 1 1/2 hours to complete.  You'll get a certificate after you complete each masterclass, so you'll have a record of the time you've invested in your herbal learning.

What’s the difference between the membership and your courses at Joybilee Academy?

The courses at Joybilee Academy are generally longer.  They don't have active support, so there are no live Q and As, no coffee chats, no dedicated Facebook group to ask questions or get feedback.  Its for people that want to learn from me but don't need or want active support.  The courses are also static.  No new material is added once the course is published.  Only one of the classes in Joybilee Academy has a certificate on completion.

On the other hand, the membership has a monthly masterclass that is designed so that you can watch each lesson during a coffee break, for those that don't have a lot of time.  There is an active component focused on hands on application for the lessons.  We learn better when we apply what we learn through hands on projects, so we integrate that into the classes. You have something to show for what you learned. There is a live monthly Q and A where the members can ask questions and get feedback.  It is recorded so those who can't make it live can view it. Also (the fellowship part) we have a monthly coffee time (not recorded) where members can get together and build relationships, network, and share.  Quarterly, inside the membership, we'll do challenges and games to help with implementation and improve how much people remember of the masterclasses. These are great for making progress on your goals and cheering others on, building relationships inside the community.

The membership has a dedicated Facebook group where members can connect, ask questions, get feedback, share information. I'm in that group daily.

Why do you need my mailing address?

Please use your best mailing address when you give us your contact information.  While there are no physical products included with the monthly membership purchase, there are periodic surprises that may be mailed out to members, so your mailing address is required when you register.

To ensure that parcels mailed to you don't get returned by the post office, please keep your mailing address up to date.  Periodically we will ask members to update their mailing address in their member account so that we can make your experience as a DIY Herbal Fellowship member awesome.

I’m a member. How do I enroll in one of the Masterclasses?

It's easy to enroll in any of the masterclasses on the site

Step 1: Log into the site using your user name and password.   If you forget your password just click on the "lost your password?" link and it will send you an email to let you reset your password.  Go here to log in.
Once you log in you'll be taken to your personal dashboard.  Here you'll see an icon that says, "Courses".  Tap/click on this icon to see all the masterclasses you have access to, in alphabetical order.  You can tap/click on the link for any of these courses to begin the course.
If you've already taken a course you'll find it under the "Profile" icon in your dashboard.  If you've already enrolled in a course, you'll find your progress under "courses" in your profile.
You'll find all the courses you have access to in your dashboard so that you can get started on that right away and get a good foundation.
Step 2: To enroll in a new DIY Herbal Masterclasses go to this link: https://thediyherbal.com/courses/ inside your dashboard.  All classes are in alphabetical order.  You can use both the search function and the category function to browse the catalog of courses.
Go to the class that interests you.  Tap/click the green "Start" button to begin any lesson.  Move through the course using the bar at the top of the page.  If you are viewing your courses on your cell phone, it's helpful to turn the screen horizontally to see the green button used for navigation, at the top of each lesson.
Step 3:  You can get back to your courses and pick up where you left off, clicking or tapping on the course icon in your dashboard under "courses" or in your profile area of the membership site.

How do I update my payment method?

This video will guide you through to update or change your payment method in your dashboard:

Herb of the Month

Masterclass

Privacy Policy

Privacy Policy

Terms of Use

Dislosure


  • Start Here
  • F.A.Q
  • Support
  • Privacy Policy
  • Terms and Conditions

Copyright © 2025 · Darling theme by Restored 316

Copyright © 2025 · Darling Theme on Genesis Framework · WordPress · Log in