DIY Herbal Fellowship

Cultivating confidence in using herbs and essential oils

  • DIY Herbal Fellowship
  • Start Here
    • DIY Herbalist Way
      • I’m a Sprout!
      • I’m a Seedling!
      • I’m Growing!
      • I’m Blossoming
      • I’m Fruitful!
  • Choose Your Own Herbal Adventure
  • Herb of the Month Club
    • Search the Herb of the Month Club
  • Techniques
  • Bonuses
    • Goal Planning For Herbalists
    • Herbalist Viral Protocol
  • Log In
  • Support
    • Join Us
    • F.A.Q
You are here: Home / Foundation / Herb Camp Day 11 — DIY Plantain Poultice

Herb Camp Day 11 — DIY Plantain Poultice

Jump to Recipe

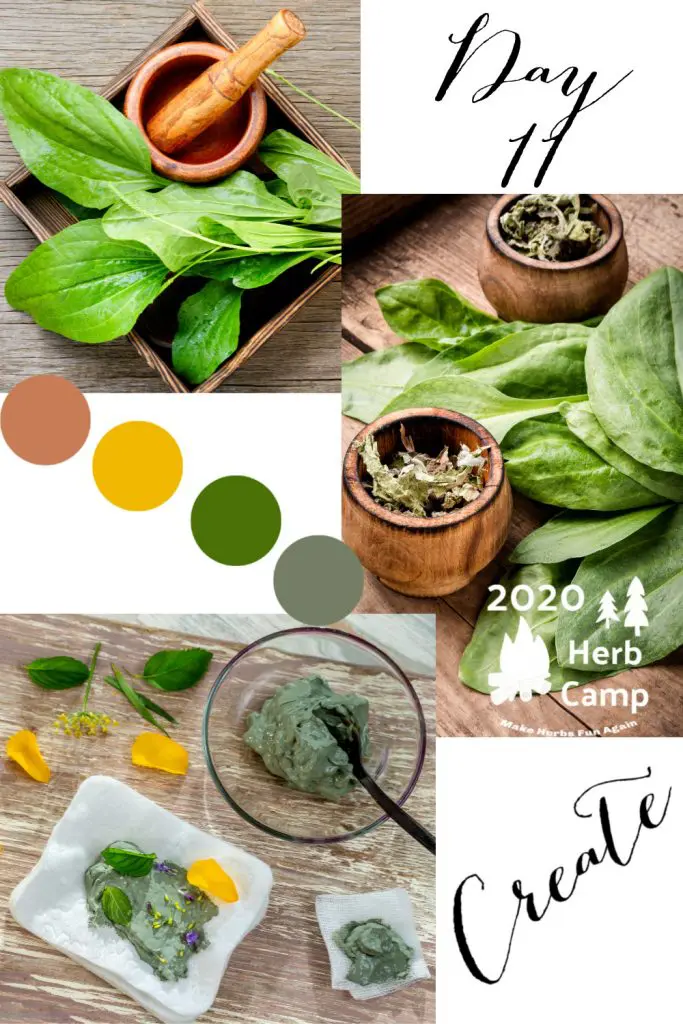
Welcome to Herb Camp 2020! In this second of three weeks of herb camp, the theme is “What do you have in your hand?” What do you have that is growing around you, that you need to heal or to inspire? In today’s Herb Camp Challenge we’re going to make a plantain poultice to pack in a tin, and keep in your glove compartment, first aid kit, or travel kit.  Plantain is the best herb for stings, boils, bites, and infections.  It draws venom from the skin and removes the pain.

Note: If you get stung by a bee, don’t try to pinch the stinger and pull it out.  The barbs will pump the venom deeper into your body.  Instead, use the edge of your nail, a credit card edge or other firm object and scrape the stinger out of your body.  Then apply a plantain poultice immediately to draw out the venom.

Day 11 Herb Camp

Ant bites are predominantly formic acid.  Using baking soda in a paste will neutralize the acid and remove the pain.  But bee stings contain a complex mixture of enzymes, peptides, and smaller molecules that cause pain and swelling in the body.  Plantain is the best remedy to draw these quickly out of the body.

The longer the venom is in the body the more pain, swelling, and inflammation can take hold, so having a plantain poultice close at hand can minimize the damaged tissue and bring fast relief.

If you are on a picnic or in the woods, fresh plantain might be close by, along the trail.  But if you have a plantain poultice in your travel kit, you won’t have to look for a plantain plant in the middle of a crisis.  If you don’t have the ready made version, grab a plantain leaf.  Make a positive ID, you don’t want to get this one wrong.

How to make a spit poultice

Every child should know this skill and be able to use it without supervision.  Teach your children and grand children to identify Plantago major and P. lanceolata.  

Chew up the raw leaf and apply it immediately to the sting.  Hold it on till the pain stops and the swelling goes down.  If the bite is serious, apply a fresh plantain poultice every few hours till the swelling lessens.  For black recluse spider bites, tick bites, or any bite that is seriously painful, contact your medical professional and have it assessed.


How to Make a Plantain Poultice using dried plantain

This recipe is also in the Herbal First Aid Travel Kit Masterclass.    Enroll in that masterclass here.

(Download the recipe)

Print

Plantain Charcoal Poultice

This recipe is also in the Herbal First Aid Travel Kit Masterclass.  For more great DIY first aid projects designed with travel in mind, enroll in that masterclass.

  • Author: Chris dl

Ingredients

Scale
  • 2 tablespoons plantain, dried
  • 1 tablespoon lavender flowers, dried
  • 2 tablespoon comfrey leaf, dried
  • 1 tablespoon activated charcoal
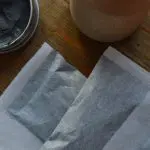
  • 3 large tea bags, press and seal

Instructions

  1. Add the ingredients to a bowl. Mix well with a whisk, being careful not to make the charcoal powder airborne as you mix. Add 2 tablespoons full of the mixture to each tea bag.
  2. Cover your ironing board with a washable towel.  The charcoal tends to leak in these before the tea bag is sealed.
  3. Set your iron to “cotton” and press the closure of each tea bag to seal it. Place the tea bags in a tin with a tight lid, and label the tin.
  4. To use:
  5. Use this poultice for bites, spider bites, bee stings, where the bite site is swollen and hard. This is also useful for slivers and boils. The herbs are drawing and antiseptic. The sooner the poultice is applied the less tissue damage from the venom.
  6. Put the tea bag in a heat proof mug or cut. Pour boiled water of the tea bag until the tea bag is just moistened, but not dripping. Allow it to sit until the bag is cool enough to handle but still warm. The tea bag should be saturated but not dripping. Press any excess moisture out of the bag so that it doesn’t drip.
  7. Place the still warm tea bag directly on the injury being careful not to burn the skin. Cover with a warmed wash cloth. Hold on the site of the bite or sting for 45 to 60 minutes or longer. The poultice can be rewarmed and used one more time.
  8. Remove the poultice. Wash the site with cold water. Repeat as often as needed until the swelling and pain is resolved.

Notes

For bites from ticks and poisonous spiders take the person to the hospital emergency. If possible take the spider or tick with you so that it can be tested for disease.

Did you make this recipe?

Tag @joybileefarm on Instagram and hashtag it #diyherbal

Recipe Card powered byTasty Recipes


If you want to add essential oils to this poultice, wait till the poultice has been heated in boiling water, then add the essential oils just before you apply it to the bite.  Essential oils will evaporate when heated.

Your assignment:

Make a plantain poultice using dried plantain.  Take a photo of your completed plantain poultice.  Share your photo inside the Facebook group in this thread.

If you are not in the Facebook group upload your photo to a photo sharing site and leave the link in the comments on this post.

Note: Click the small arrow on the LEFT to go to the previous day’s Herb Camp Challenge. Click the small arrow on the RIGHT to go to the next day’s Herb Camp Challenge.

«
»

Foundation, Herb Camp 2

Comments

  1. Cindy Gorney says

    07/01/2020 at 2:05 pm

    I don’t have any dried…yet. but I’m going to go out and pick some fresh for a spit poultice for my bites and also pick enough to fill a dehydrator shelf so I can make your recipe with lavender which I also have access to.

    Log in to Reply
  2. Bobbi Thompson says

    06/16/2020 at 12:38 pm

    I walked all over our property, sadly, there is no plantain on it.
    I do have marigolds popping up all over there is still some yarrow but no plantain.

    I will have to either purchase some or harvest some the next time we are in the mountains.

    Log in to Reply

Leave a Reply Cancel reply

You must be logged in to post a comment.

Welcome back member! Log in here!


Forgot Password

The DIY Herbal Fellowship is here to help you invest in self-reliance, cultivate community, and grow in resilience, through confidently growing and using herbs for food, and for health and wellness. Welcome to the Resistance!

Q and A Search

We are here for you!

Or email: support@thediyherbal.com


Frequently Asked Questions

How is the DIY Herbal Fellowship different from other herbal programs like the Herbal Academy?

At the DIY Herbal Fellowship, we emphasize homegrown and foraged herbalism. We teach how to grow your own medicine, so you aren't dependent on the global supply chain for your wellness.

In the classes from other herb schools you'll get a long list of herbs you need to buy in order to complete the classes and a lot of these herbs are from herbal traditions from tropical climates, so you will need to buy imported herbs, that may have been in storage a long time before they reach you.  Herbs you can grow and harvest close to where you live have been challenged by the same stressors that you've been challenged with and they have the unique metabolites that you need to thrive.

We also provide a list of herbs that you can buy if you don't have access to a garden or places you can forage, but growing your own gives you access to that unique property in herbs, that you can't buy in a store.

I’ve enrolled in herb classes from other herb schools that I didn’t complete. Can I successfully complete anything inside the DIY Herbal Fellowship?

Joining the DIY Herbal Fellowship can give you the support you need to complete the courses you've already signed up for, if you still have access to them.  Many of our members are also working through certificate programs at Herbal Academy or other herb schools. They use the support and the methods we teach in the DIY Herbal Fellowship to help them systematically work through their other courses and retain the information they are learning.

The masterclasses inside the DIY Herbal Fellowship are different than what you'll find in other herb schools.  We have success built into each masterclass.  The lessons are designed to be completed during a break time, so that busy women don't get left behind.  (Aren't we all very busy!)Each lesson inside the masterclasses are just 15 to 20 minutes long.  The hands on projects can be done in the margins, while you are working on other things, like supervising homework, or waiting for dinner to cook.  You don't need to wait till you have a few hours alone-time to get started.  15 minutes can be a start.

Also you'll enjoy quarterly implementation challenges to encourage you along your journey.  These include games or other strategies to keep you moving forward to reach your goals and master the aspects within herbal studies that are important to you.

If you have a life challenge though, and can't complete the monthly masterclasses for a period of time, you don't lose access to them, as long as you remain a member in good standing.  The masterclasses will wait for you.

How much time does it take to complete a masterclass? I don’t have a lot of time.

You'll want to have at least one hour a week to dedicate to the DIY Herbal Fellowship, to complete at least one masterclass a month, do the hands on projects, participate in the Q and A and the coffee chat.  If you don't have that much time, you might feel frustrated inside the DIY Herbal Fellowship because you'll miss the interaction and the support.  If you have more than one hour a week available, you'll be able to do several masterclasses each month.  Each masterclass takes between one hour and 1 1/2 hours to complete.  You'll get a certificate after you complete each masterclass, so you'll have a record of the time you've invested in your herbal learning.

What’s the difference between the membership and your courses at Joybilee Academy?

The courses at Joybilee Academy are generally longer.  They don't have active support, so there are no live Q and As, no coffee chats, no dedicated Facebook group to ask questions or get feedback.  Its for people that want to learn from me but don't need or want active support.  The courses are also static.  No new material is added once the course is published.  Only one of the classes in Joybilee Academy has a certificate on completion.

On the other hand, the membership has a monthly masterclass that is designed so that you can watch each lesson during a coffee break, for those that don't have a lot of time.  There is an active component focused on hands on application for the lessons.  We learn better when we apply what we learn through hands on projects, so we integrate that into the classes. You have something to show for what you learned. There is a live monthly Q and A where the members can ask questions and get feedback.  It is recorded so those who can't make it live can view it. Also (the fellowship part) we have a monthly coffee time (not recorded) where members can get together and build relationships, network, and share.  Quarterly, inside the membership, we'll do challenges and games to help with implementation and improve how much people remember of the masterclasses. These are great for making progress on your goals and cheering others on, building relationships inside the community.

The membership has a dedicated Facebook group where members can connect, ask questions, get feedback, share information. I'm in that group daily.

Why do you need my mailing address?

Please use your best mailing address when you give us your contact information.  While there are no physical products included with the monthly membership purchase, there are periodic surprises that may be mailed out to members, so your mailing address is required when you register.

To ensure that parcels mailed to you don't get returned by the post office, please keep your mailing address up to date.  Periodically we will ask members to update their mailing address in their member account so that we can make your experience as a DIY Herbal Fellowship member awesome.

I’m a member. How do I enroll in one of the Masterclasses?

It's easy to enroll in any of the masterclasses on the site

Step 1: Log into the site using your user name and password.   If you forget your password just click on the "lost your password?" link and it will send you an email to let you reset your password.  Go here to log in.
Once you log in you'll be taken to your personal dashboard.  Here you'll see an icon that says, "Courses".  Tap/click on this icon to see all the masterclasses you have access to, in alphabetical order.  You can tap/click on the link for any of these courses to begin the course.
If you've already taken a course you'll find it under the "Profile" icon in your dashboard.  If you've already enrolled in a course, you'll find your progress under "courses" in your profile.
You'll find all the courses you have access to in your dashboard so that you can get started on that right away and get a good foundation.
Step 2: To enroll in a new DIY Herbal Masterclasses go to this link: https://thediyherbal.com/courses/ inside your dashboard.  All classes are in alphabetical order.  You can use both the search function and the category function to browse the catalog of courses.
Go to the class that interests you.  Tap/click the green "Start" button to begin any lesson.  Move through the course using the bar at the top of the page.  If you are viewing your courses on your cell phone, it's helpful to turn the screen horizontally to see the green button used for navigation, at the top of each lesson.
Step 3:  You can get back to your courses and pick up where you left off, clicking or tapping on the course icon in your dashboard under "courses" or in your profile area of the membership site.

How do I update my payment method?

This video will guide you through to update or change your payment method in your dashboard:

Herb of the Month

Masterclass

Privacy Policy

Privacy Policy

Terms of Use

Dislosure


  • Start Here
  • F.A.Q
  • Support
  • Privacy Policy
  • Terms and Conditions

Copyright © 2025 · Darling theme by Restored 316

Copyright © 2025 · Darling Theme on Genesis Framework · WordPress · Log in