DIY Herbal Fellowship

Cultivating confidence in using herbs and essential oils

  • DIY Herbal Fellowship
  • Start Here
    • DIY Herbalist Way
      • I’m a Sprout!
      • I’m a Seedling!
      • I’m Growing!
      • I’m Blossoming
      • I’m Fruitful!
  • Choose Your Own Herbal Adventure
  • Herb of the Month Club
    • Search the Herb of the Month Club
  • Techniques
  • Bonuses
    • Goal Planning For Herbalists
    • Herbalist Viral Protocol
  • Log In
  • Support
    • Join Us
    • F.A.Q
You are here: Home / Foundation / Balm of Gilead Infusion for Reducing Inflammation and Pain

Balm of Gilead Infusion for Reducing Inflammation and Pain

Balm of Gilead is the folk term for the buds of balsam poplar (Eastern) and Black Cottonwood (Western) trees in North America. In Africa and the Middle East another tree called Balm of Gilead also has aromatic resin.  This is the one mentioned in the Bible  This article is focused on the North American species.

To get Balm of Gilead, the resinous buds of these poplar family trees are harvested in early spring before bud break.  The sticky buds are aromatic and filled with a red resin.  On warm days the perfume will fill the air.  The tell tale aroma is a harbinger of warmer days.

The trees break bud when warmer days are followed by nights that are just above freezing, when the sap flows freely.  You’ll want to time your harvest before the last frost in your area and before the days become too warm.  Once the trees leaf out your window of opportunity is gone.

If you missed the season for harvest in your vicinity, going higher into the mountains can bring you balsam buds that are ready to harvest.  As the snow recedes in the mountains the buds swell and get ready to break.  Follow that line of snow melt and you should find harvest-able buds until May or even early June.

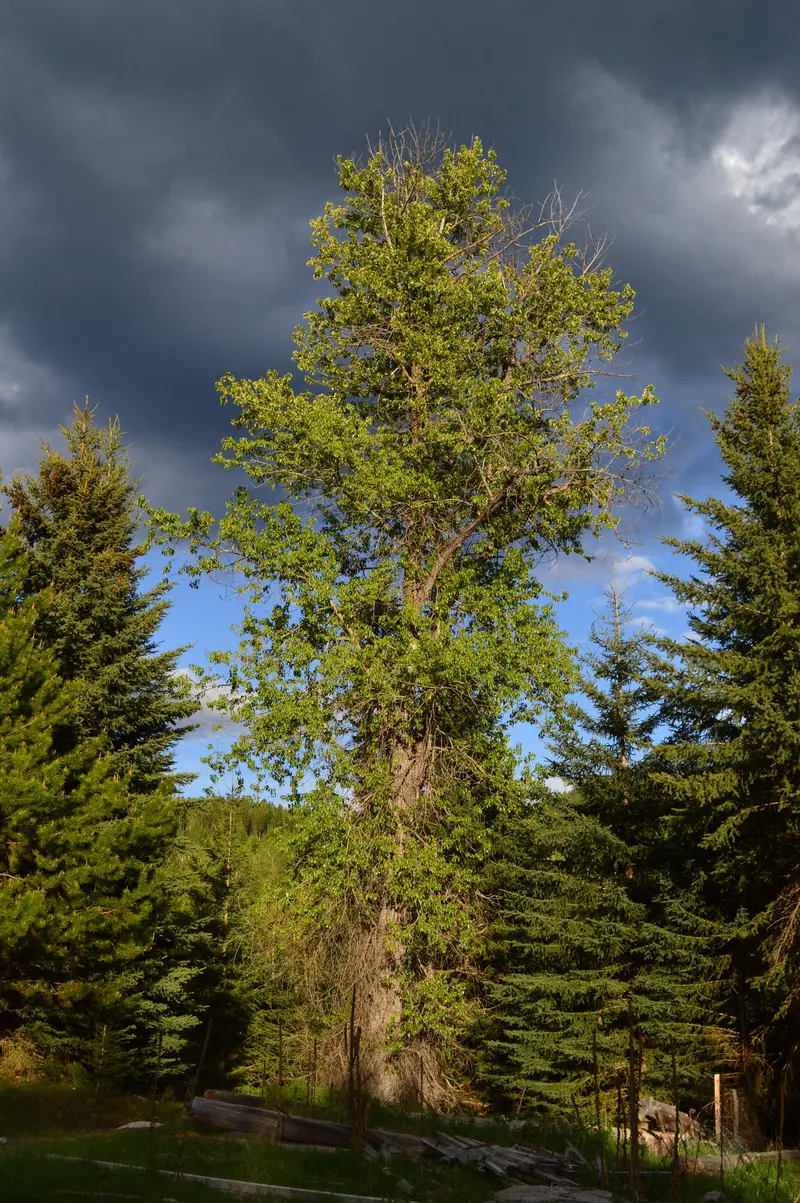
Black Cottonwood in late spring

Balm of Gilead benefits

The resin of balm of Gilead is soluble in oil and in alcohol.  It can be used as a tincture, though it has a bitter flavor.  It is predominantly used in salve making and as a massage oil.  The resin contains salicin and was traditionally used as an analgesic anti-inflammatory herb.  Those who are allergic to aspirin should speak to their doctor before self-medicating with balm of Gilead.

  • Analgesic
  • Anti-inflammatory
  • Anti-oxidant
  • Antibacterial
  • Astringent
  • Helps with wound healing
  • Soothes cough
  • Soothes burns and sunburn
  • Relieves headache
  • Antitumor and Anticancer

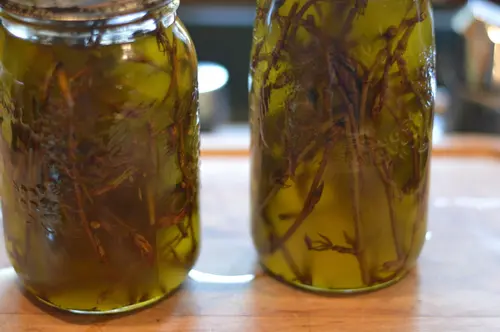
It was a season with very few buds, after a very dry summer the year before, so rather than harvest the few buds that were there, I clipped the ends of downed branches, including the buds and infused my oil with the branch ends. (2017 picture)

Make positive identification of the tree

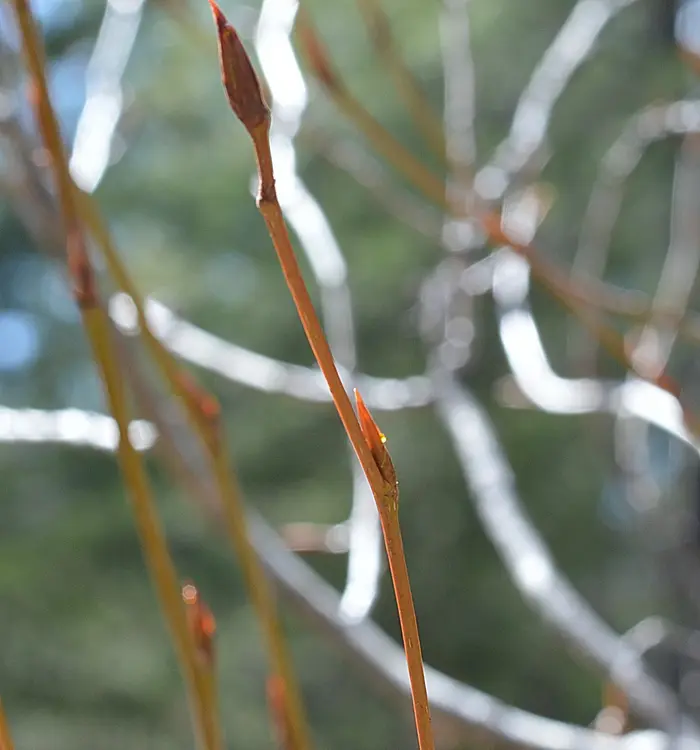
To determine if the cottonwood or poplar trees growing near you are the right kind, touch and smell the young leaf-buds, before leaf break.  The smell is a strong pleasant perfume, with a hint of camphor.  The buds will be sticky and resinous, coating your fingers with a reddish brown gum.  The young branch tips will be deeply colored with the rising sap.

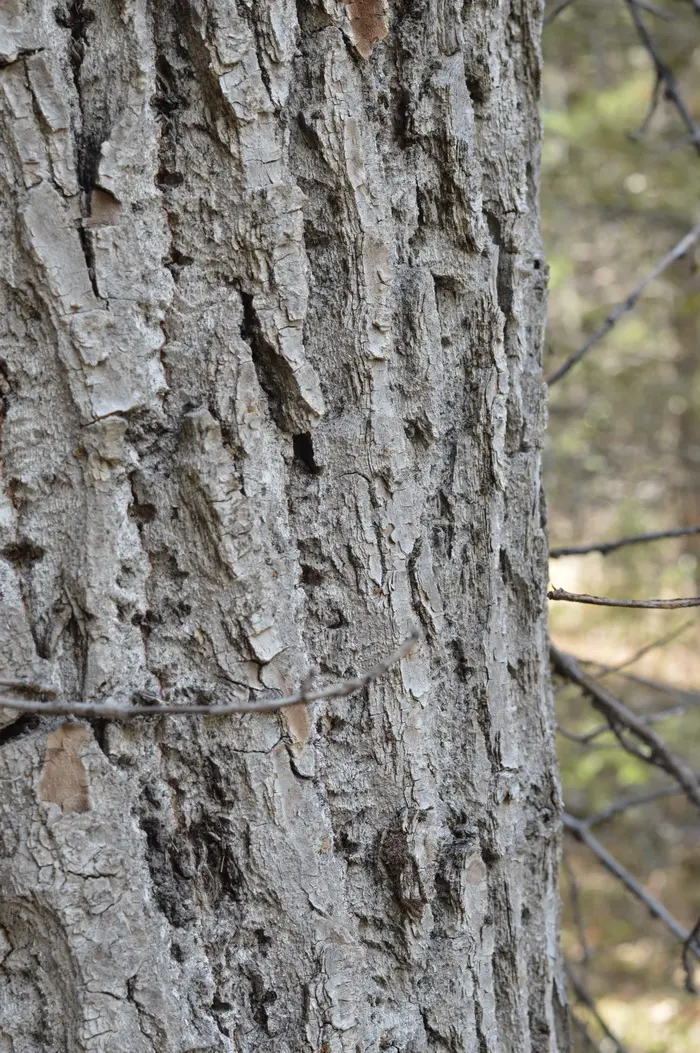
Mature black cottonwood bark

These pictures are of the Black Cottonwood, native to Western North America.  The bark of the trunk of a mature Black Cottonwood tree is grey, and deeply fissured.


Young black cottonwood trunk


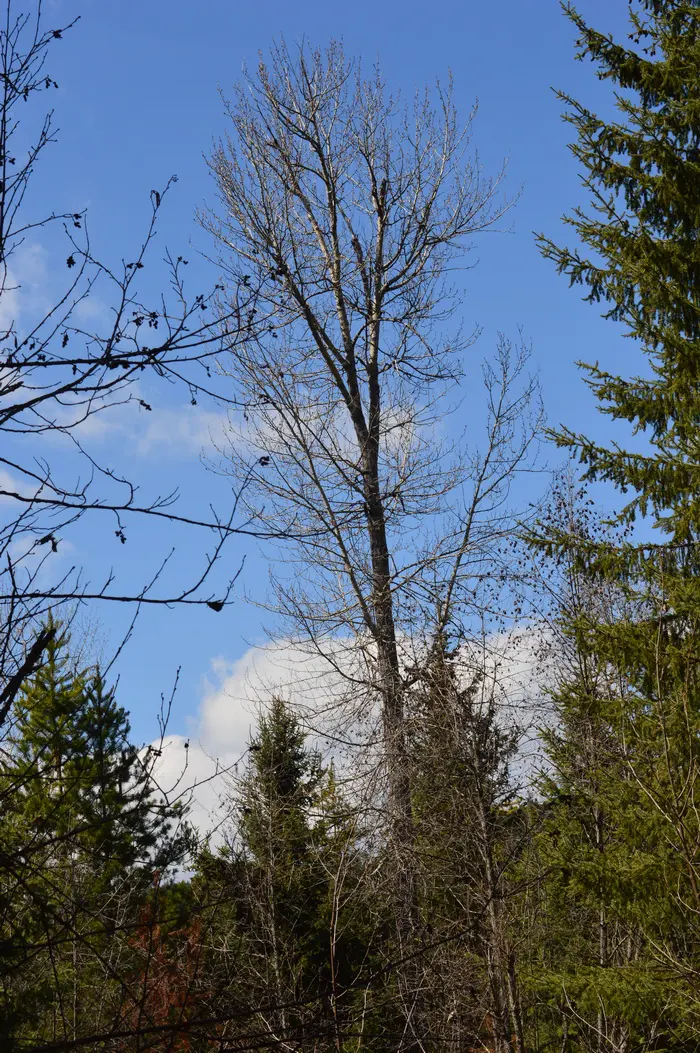
The young tree bark is grayish green with prominent lenticels, similar to birch.  The young growth colors to bright reddish brown as the sap rises in spring.  The mature tree can be up to 30 meters (100 feet) tall and has a distinctive silhouette in the spring landscape.

If you are looking for the tree in the summer, it will be fully leafed out.  The leaves are dark green, long, and sometimes heart shaped. On the underside of the leaf, there is often a splotch of the reddish brown resin still evident.

The cottonwood trees are prone to wind damage and a windfall branch in winter or early spring can yield an abundance of resinous buds.  If you find such a treasure, be sure to harvest every single bud.  On the other hand, usually the tree is too tall to allow you to harvest from a mature tree, and those looking for this herbal treasure will be searching for young saplings between 2 feet and 10 feet tall.  At this height the trunk is supple and the branches can be bent over to bring the buds within easy picking range.

I’m told that the First Nations people in British Columbia tap the mature cottonwood trees to gather the resinous healing sap, but I haven’t personal experience with this way to harvest Balm of Gilead.  I’d love to learn more about this practice.


Foragers Code of Ethics

  • Only harvest on land that you own or land where you have permission to harvest.
  • Make positive identification of the tree.
  • Don’t take more than 1/3rd of the buds from a living tree
  • Don’t take the terminal tip on any branch from a living tree
  • If you can harvest from a wind-fallen branch this is idea
  • Respect the growth needs of the tree.
  • Use all that you take.

Conscientiously harvesting the buds

The cottonwood buds contain the sticky resin that is responsible for the healing properties of Balm of Gilead.  The resin is the sap from tree.  If you wait another week or two, these buds will swell with the resin and then the leaves will unfold.  Once the leaves break the window for the harvest season is over.

Since the buds represent the leaves of the tree, you want to leave enough buds on the plant to nourish the root for another season and produce the next spring’s leaf buds.  The leaf buds grow during the summer months and then lie dormant on the tree from leaf drop until they swell with the rising sap, the following spring.  A general rule for harvesting balm buds, is to never take the terminal bud, as this bud represents the growing branches, as well as the future leaves.  Of the buds that alternate along the branch, take only 1/3rd.  Don’t harvest from a tree that has already been harvested from – including those buds eaten by deer. Over harvest will kill the young trees.

How to make balm of Gilead Oil

Gather the buds of balsam poplar or black cottonwood trees in early spring before bud break.

Let the buds wilt for several hours.  Do not wash them.

Put the buds in a wide mouth mason jar.  Cover with virgin olive oil or another stable carrier oil like sweet almond oil.

Cap tightly.  Label the jar with the herb name and date.

Shake the jar daily or as often as you think of it.  This helps prevent mold by keeping the buds immersed in the oil.

After 6 weeks (longer is fine) strain the buds from the oil, pressing to retain as much of the oil as possible.  Discard spent buds.

Use this oil as a massage oil or make a salve with it.


To make balm of Gilead salve

The slow way

If you plan to add essential oils to this salve, choose essential oils according to the final use of the salve.  For instance, if you are using this for first aid purposes you may want to add lavender or tea tree for additional antimicrobial and anti fungal qualities.  If you are using it to help with congestion, adding eucalyptus or Balm Mint Bush (kidsafe) can help.

Makes 3 ounces

  • 1/4 cup Balm of Gilead infused oil
  • 2 teaspoon beeswax (8 grams)
  • 28 drops essential oil (2%) (optional)

Directions:

  • Make a double boiler using a glass measuring cup placed in a saucepan.  Fill the pan with water till it reaches half way up the sides of the measuring cup.
  • Add the infused oil and the beeswax to the glass measuring cup.  Melt the beeswax over medium heat.  Stir to combine the beeswax and oil.  Remove from heat.
  • Add essential oils if desired.  Stir to combine.
  • Pour into salve tins.
  • Label and date.  Salve should last 2 years if the oils that you used are stable.


Use for arthritis, bursitis, joint pain, muscle ache, wound care, and chest congestion.

Action Step:

Find black cottonwood or balsam poplar trees in your region.  If you are within the harvest window, find a downed branch and harvest 2 or 3 cups of resinous buds for balm of Gilead infused oil.  Make the infused oil.  In the comments tell us about your experience.


«
»

Foundation, Sprout, Wildcrafting 2

Comments

  1. Bobbi Thompson says

    11/15/2020 at 6:37 pm

    Though, the new buds won’t appear until next spring..

    Log in to Reply
  2. Bobbi Thompson says

    11/15/2020 at 6:37 pm

    I have some poplar trees growing in my backyard, they grow all over.. not sure if they are the “black” poplar.

    Log in to Reply

Leave a Reply Cancel reply

You must be logged in to post a comment.

Welcome back member! Log in here!


Forgot Password

The DIY Herbal Fellowship is here to help you invest in self-reliance, cultivate community, and grow in resilience, through confidently growing and using herbs for food, and for health and wellness. Welcome to the Resistance!

Q and A Search

We are here for you!

Or email: support@thediyherbal.com


Frequently Asked Questions

How is the DIY Herbal Fellowship different from other herbal programs like the Herbal Academy?

At the DIY Herbal Fellowship, we emphasize homegrown and foraged herbalism. We teach how to grow your own medicine, so you aren't dependent on the global supply chain for your wellness.

In the classes from other herb schools you'll get a long list of herbs you need to buy in order to complete the classes and a lot of these herbs are from herbal traditions from tropical climates, so you will need to buy imported herbs, that may have been in storage a long time before they reach you.  Herbs you can grow and harvest close to where you live have been challenged by the same stressors that you've been challenged with and they have the unique metabolites that you need to thrive.

We also provide a list of herbs that you can buy if you don't have access to a garden or places you can forage, but growing your own gives you access to that unique property in herbs, that you can't buy in a store.

I’ve enrolled in herb classes from other herb schools that I didn’t complete. Can I successfully complete anything inside the DIY Herbal Fellowship?

Joining the DIY Herbal Fellowship can give you the support you need to complete the courses you've already signed up for, if you still have access to them.  Many of our members are also working through certificate programs at Herbal Academy or other herb schools. They use the support and the methods we teach in the DIY Herbal Fellowship to help them systematically work through their other courses and retain the information they are learning.

The masterclasses inside the DIY Herbal Fellowship are different than what you'll find in other herb schools.  We have success built into each masterclass.  The lessons are designed to be completed during a break time, so that busy women don't get left behind.  (Aren't we all very busy!)Each lesson inside the masterclasses are just 15 to 20 minutes long.  The hands on projects can be done in the margins, while you are working on other things, like supervising homework, or waiting for dinner to cook.  You don't need to wait till you have a few hours alone-time to get started.  15 minutes can be a start.

Also you'll enjoy quarterly implementation challenges to encourage you along your journey.  These include games or other strategies to keep you moving forward to reach your goals and master the aspects within herbal studies that are important to you.

If you have a life challenge though, and can't complete the monthly masterclasses for a period of time, you don't lose access to them, as long as you remain a member in good standing.  The masterclasses will wait for you.

How much time does it take to complete a masterclass? I don’t have a lot of time.

You'll want to have at least one hour a week to dedicate to the DIY Herbal Fellowship, to complete at least one masterclass a month, do the hands on projects, participate in the Q and A and the coffee chat.  If you don't have that much time, you might feel frustrated inside the DIY Herbal Fellowship because you'll miss the interaction and the support.  If you have more than one hour a week available, you'll be able to do several masterclasses each month.  Each masterclass takes between one hour and 1 1/2 hours to complete.  You'll get a certificate after you complete each masterclass, so you'll have a record of the time you've invested in your herbal learning.

What’s the difference between the membership and your courses at Joybilee Academy?

The courses at Joybilee Academy are generally longer.  They don't have active support, so there are no live Q and As, no coffee chats, no dedicated Facebook group to ask questions or get feedback.  Its for people that want to learn from me but don't need or want active support.  The courses are also static.  No new material is added once the course is published.  Only one of the classes in Joybilee Academy has a certificate on completion.

On the other hand, the membership has a monthly masterclass that is designed so that you can watch each lesson during a coffee break, for those that don't have a lot of time.  There is an active component focused on hands on application for the lessons.  We learn better when we apply what we learn through hands on projects, so we integrate that into the classes. You have something to show for what you learned. There is a live monthly Q and A where the members can ask questions and get feedback.  It is recorded so those who can't make it live can view it. Also (the fellowship part) we have a monthly coffee time (not recorded) where members can get together and build relationships, network, and share.  Quarterly, inside the membership, we'll do challenges and games to help with implementation and improve how much people remember of the masterclasses. These are great for making progress on your goals and cheering others on, building relationships inside the community.

The membership has a dedicated Facebook group where members can connect, ask questions, get feedback, share information. I'm in that group daily.

Why do you need my mailing address?

Please use your best mailing address when you give us your contact information.  While there are no physical products included with the monthly membership purchase, there are periodic surprises that may be mailed out to members, so your mailing address is required when you register.

To ensure that parcels mailed to you don't get returned by the post office, please keep your mailing address up to date.  Periodically we will ask members to update their mailing address in their member account so that we can make your experience as a DIY Herbal Fellowship member awesome.

I’m a member. How do I enroll in one of the Masterclasses?

It's easy to enroll in any of the masterclasses on the site

Step 1: Log into the site using your user name and password.   If you forget your password just click on the "lost your password?" link and it will send you an email to let you reset your password.  Go here to log in.
Once you log in you'll be taken to your personal dashboard.  Here you'll see an icon that says, "Courses".  Tap/click on this icon to see all the masterclasses you have access to, in alphabetical order.  You can tap/click on the link for any of these courses to begin the course.
If you've already taken a course you'll find it under the "Profile" icon in your dashboard.  If you've already enrolled in a course, you'll find your progress under "courses" in your profile.
You'll find all the courses you have access to in your dashboard so that you can get started on that right away and get a good foundation.
Step 2: To enroll in a new DIY Herbal Masterclasses go to this link: https://thediyherbal.com/courses/ inside your dashboard.  All classes are in alphabetical order.  You can use both the search function and the category function to browse the catalog of courses.
Go to the class that interests you.  Tap/click the green "Start" button to begin any lesson.  Move through the course using the bar at the top of the page.  If you are viewing your courses on your cell phone, it's helpful to turn the screen horizontally to see the green button used for navigation, at the top of each lesson.
Step 3:  You can get back to your courses and pick up where you left off, clicking or tapping on the course icon in your dashboard under "courses" or in your profile area of the membership site.

How do I update my payment method?

This video will guide you through to update or change your payment method in your dashboard:

Herb of the Month

Masterclass

Privacy Policy

Privacy Policy

Terms of Use

Dislosure


  • Start Here
  • F.A.Q
  • Support
  • Privacy Policy
  • Terms and Conditions

Copyright © 2025 · Darling theme by Restored 316

Copyright © 2025 · Darling Theme on Genesis Framework · WordPress · Log in